Showing posts with label Scanning. Show all posts

Tuesday, 24 September 2024

How to Scan to Searchable PDF

Scanning Documents to Keyword Searchable PDFs

Recently I was loaned a 1976 typewritten document comprising of stories told about family life in a small village in County Mayo, Ireland dating back to the 1850s. The Appendix contained valuable genealogical information related to the author's family. It also contained a summary of the surnames and population numbers of the tenants and their landholdings in the early 20th century compared to 1976.

To preserve the valuable historical data in this document for future generations before returning the paper file to the owner, I decided to scan it. I now await permission from the son of the author to share this document to an archival space.

Keyword Searchable PDFs allow users to quickly find specific text within a document, and avoid the loss of valuable information currently stored only on paper.

How often does one scan a document to find that the PDF generated is not searchable? Scans are digital images and often the PDF function just combines all the images into a PDF. Yes, there are a variety of tools that will read the text within an image, but if one has a document of many pages it is preferable to scan to a keyword searchable PDF

There are a variety of paid apps that one can use with tablets and phones but I looked within the software that is supplied with  two common brands of flatbed scanners. 

Canon 


Canon flatbed scanner

The Canon scanners have this feature. Choose the Document function. Once all the images are scanned, the Save As menu provides the prompt - Create a PDF file that supports keyword search.

From the Canon manual

Epson

The WF series of Epson printer/scanners also have this built in function. Instructions can be viewed here on pages 159-160.

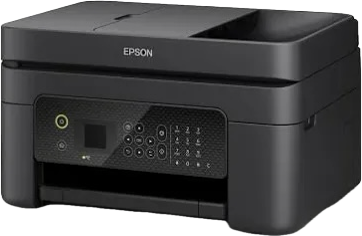
Epson multifunction printer/scanner


Why settle for less when you are scanning documents?
  1. Searchable PDFs allow users to quickly find specific text within a document, saving time compared to manually browsing.
  2. Digitizing paper documents reduces physical storage needs, freeing up space and minimizing clutter. It preserves the paper copy in case of subsequent loss or damage.
  3. Searchable PDFs can be easily shared and annotated, making collaboration with others more straightforward. They are accessible to screen readers. 
  4. For genealogists and family historians, preserve those fragile documents while you can.
Check your scanner's software before looking for expensive alternatives.

This post first appeared on https://carmelgalvin.info

Sunday, 21 August 2022

Scanning tools and adding text to photos

#NFHM2022 Week 3 - Two tools


Recently I have been re-scanning some old family photos and paying greater attention to the correction details available within the scanner's software. So this post is about two tools I find very useful for family history.

1. The Scanner

My Canon LIDE300 flatbed scanner provides a range of tools for making colour correction to those old faded photos from the seventies and eighties. It is also simple enough for excellent correction to be made to old sepia and black and white photos.

I'm sure most scanners' software would have these functions, it is just a matter of taking time to find them. The temptation to just choose Photo for a simple scan does not reveal all the tools but simply saves the scanned photos to a designated folder.

Using the scanners' software gives me many of the correction tools I would otherwise need to use in a program such as Photoshop.

From the opening screen one selects ScanGear to reveal all the possibilities. 
Scanner menu

Place more than one photo on the platen and preview.
Choose individual settings for each photo before final scan.

In the screenshot of the Preview screen above the photo on the left is from the 1970s with fading correction set to medium and the one on the right from the mid 1980s with fading correction set to low.
Further adjustments can be made to each photo prior to the final scan using the saturation/colour correction, brightness/contrast, black/white points or tone curve tools.

2. Paint by Microsoft

This small utility program comes pre-installed with Windows. When I have a photo or newspaper clipping that I want to add text to, this is a simple method.
 
Find Paint by searching in the bottom bar on Windows. 
  1. File >Open to navigate to your image, or copy and paste an image in.
  2. Use the dot displayed at the centre bottom of your photo to pull down to extend the canvas
  3. Select the text tool and draw a text box in the white space now available
  4. Type in the box
  5. Save file as jpg or png
Paint is also a simple free way to add arrows and other shapes to screen clippings as in the Scanner images at the beginning of this post.

Here is a short demonstration of how to add text using Paint, to any image file


Enjoyed this post? Want to see more?