Wednesday, 26 January 2022

Geneary and eleven others


What shall I do?

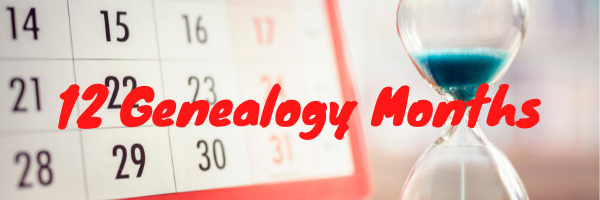
Much has been written about establishing goals in whatever field of endeavour that interests one. If you are stuck for ideas here's a genealogy slant on the months of 2022. After all, one wants to have fun!

Geneary

This month is nearly gone today being the 26th. I've done some web editing for the local society, attended planning meetings, prepared a display, updated an index, edited some entries in our library catalogue and purchased a new laptop for the local group. We are all weary of the ongoing Covid pandemic but a successful volunteers' morning for our group brought us together with hopes for a better year.

Febituary

A blog post is planned with obituaries found in Trove relevant to my families' stories. 

Marchart

Perhaps I'll look at the variety of charts available through the genealogy software packages. Keep these in mind for family gifts.

Appreality

Time to revisit all those apps on my devices, tablet, phone and computer. Do I really need 4 notetaking programs, 5 genealogy programs and 3 cloud services? I'm sure there are more than those, it will take time to review their uses.

Maydoit

Oh, this is an easy one, there are so many things I may do! What about finishing digitising the photos or compiling those blog posts into some order for publication. I may do it.

Junkit

What's in the bottom of that cupboard and those drawers? Is it time to discard rarely used resources purchased in the fresh flush of genealogy endeavours?

Jubilate

More than halfway through the year it will be time to celebrate all that has been achieved.

Augmentit

Time to get back to Wikitree and add ancestors' profiles, sources and biographies. Could be a month to improve the entries on FindaGrave as well.

Septarate 

Perhaps break up those stories into separate families for ease of reading

Octendit

Extend the previous months' activities into this one, sure to get something done!

Novover

Not time to move over yet, but a rollover of tasks not previously done. Oh dear, this is getting repetitive.

Declaimber

Time to tell one and all about the wonderful achievements throughout the year. 
Cheers to a successful genealogy year.

Now what was it that I came to the computer to do?

This post first appeared on https://carmelgalvin.info

Sunday, 7 November 2021

Photos, photos and more photos


A brief, limited post about many photos!

A lively Twitter chat #ANZAncestryTime about photo digitization and storage provided some ideas and prompted me to find a couple of previous posts I had written on this topic, this one back in 2014 on Organising photos and another on sharing photos via Flickr and Trove.

Time and software move on but some simple methods for preserving photos and the information about them are worth revisiting.

Adding data to scanned photos

I regularly use a simple Paint program on my Windows computer to add extra white canvas to a photo and then type in as much detail as known about the photo. This is in addition to adding the metadata in the details fields of the photos.

1. Copy the photo, open Paint and paste
2. Drag the bottom corner either sideways or down to create extra canvas. You may need to zoom out in order to see the bottom of your photo. Here I have zoomed out to 12.5%.
3. Select the Text button to type in the details
Adding white space in Paint
Most photo editing software packages have this function to add extra canvas for typing but as Paint is part of Windows and extremely simple to use this is a very quick method for adding text.

In the free Irfanview the option is under Image > Change canvas size.
Two free online options that do not need a login are Lunapic and Pixlr.

File naming

Early in my photo digitization process, I realized the need for a consistent file naming pattern. A simple spreadsheet helps me name files consistently. The clip below shows the details to be added, then the final column, in this case, column H puts the data together generating the file name to copy. The simple formula used here is CONCATENATE to join all the columns that have data in them. 
This works for a wide variety of photos as one need only fill in the details available such as the street scene photo listed in row 5. Empty cells are ignored with this formula. Column D has an underscore which separates the name of the photo or the Who from the rest of the more descriptive elements of the file name.


My photos are then stored in surname folders where applicable with the rest filed either by year or place. All photos and data are backed up to external hard drives and cloud storage.

Storage

Physical photos once scanned are added to Albox archival albums which I purchased from Gould Genealogy The photo pages have convenient slip-in labels for adding detail about the photos.

Sharing

I initially used a Dropbox folder for sharing with immediate family but now I have paid storage elsewhere I add photos and documents to Google Drive and share folders from there. Stories using photos in blog posts over on Earlier Years are designed to reach a wider audience.

This post first appeared on https://carmelgalvin.info

Wednesday, 8 September 2021

Saving Trove lists


Do you have a variety of Trove lists made as you research your family history? 

It is likely that you compiled these over time as new resources became available through Trove. Any newly found item added to a Trove list is always added at the end, so over time, the lists become unwieldy. There is a filter by date option, but what if you have forgotten the year in which that article appeared or you would prefer to have more control over the data in the list?

Here's a handy guide for saving and adding lists to your computer so that you can manipulate the data in a spreadsheet.

Log in to Trove and select the list to download. Decide whether to filter by date or type. Here I have chosen the whole list as it has only 51 items.


Open in Excel or equivalent spreadsheet. There are several columns that can be deleted before you begin to sort the data. The only columns to retain are:
  1. itemSequence - that is what number it is in the list
  2. itemNote - any notes made about why the item was added to the list
  3. itemThumbnailImage - more about this column later
  4. workTitle - the title of that section of the page
  5. workDate - this one will be split for sorting
  6. workPage - page number
  7. workFormat - whether it is a Family Notice, article etc

The next step

Insert three columns to the right of workDate.
Choose the Data tab, highlight the workDate column then Text to Columns


Follow the wizard, choose Delimited

choose delimited

On the next screen choose space.

choose space

This displays how the data will be distributed in the blank columns you previously added. On the final wizard screen, leave the choice as General then words will remain as text and numerals will be formatted as number data.

Change the column headers to match the newly created columns. Day, Date, Month Year.
Save, then highlight the whole spreadsheet. From the Data tab choose Sort.


Add the Month column next and choose Custom list to see the built-in Custom lists.


Add another level for Date so the final sort screen shows as below.


The data now displays in date order as it was published.

One final step to make this spreadsheet useful. 
The links in the column titled itemThumbnailImage only display a thumbnail of the page. 
  1. Highlight the column
  2. CTRL-F to Find -t then leave the Replace field blank. 
This will remove the thumbnail so that the link will redirect to the full page where the article is located.

Now one has a useable timeline of all the articles saved for that family complete with the notes made about the article at the time.

Have you downloaded any of your Trove lists since the upgrade last June?

This post first appeared on https://carmelgalvin.info

Enjoyed this post? Want to see more?